
Desserts
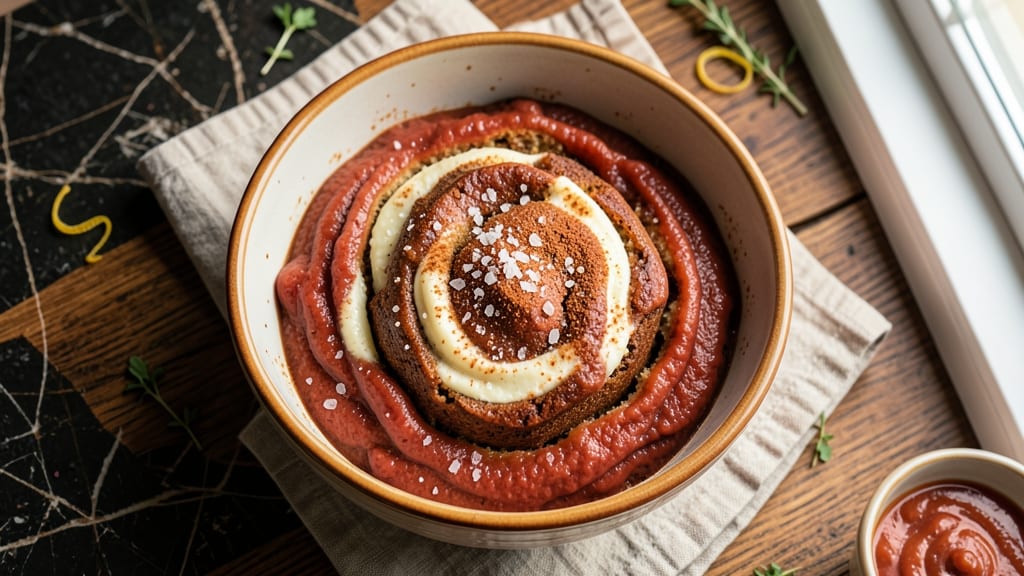
This afterschool banana bread recipe transforms simple ingredients into a moist, comforting treat that kids will beg for after school. The secret lies in a single bowl, minimal effort, and those perfect walnut streaks that add texture and crunch—no fancy equipment required.
I developed this version after years of testing, ensuring it's foolproof for busy parents and satisfying for hungry kids.
The beauty of this recipe is its simplicity: just mix, pour, and bake. With walnuts folded into the batter, each slice delivers a satisfying contrast of tender bread and nutty crunch. The banana flavor shines through without being overpowering, making it a treat that's both comforting and balanced.
Perfect for after-school snack time, it bakes up in under an hour and stays fresh for days.
What you'll end up with is a loaf of golden-brown banana bread with a tender crumb and those signature walnut streaks that make every bite exciting. The aroma alone will have kids rushing to the table, and the texture—soft yet sturdy—is just right for slicing into thick, hearty portions.
This is the kind of treat that feels special without requiring a lot of effort.
Whether you're looking for a quick after-school snack or a weekend baking project, this recipe delivers. The one-bowl method means easy cleanup, and the walnuts add a touch of sophistication that elevates it beyond basic banana bread. Let's get baking!
Ingredients for afterschool banana bread
Simple ingredients that transform into a moist, comforting treat perfect for after-school snacking.
| Ingredient | Amount | Notes |
|---|---|---|
| Ripe Bananas 🍌 | 2 cups | Mashed, about 3-4 medium bananas |
| All-Purpose Flour 🌾 | 1 ½ cups | Sifted for even texture |
| Granulated Sugar 🍚 | 1 cup | White or light brown sugar |
| Packed Brown Sugar 🍚 | ½ cup | For moisture and depth |
| Unsalted Butter 🧈 | ½ cup | Room temperature, full-fat |
| Large Eggs 🥚 | 2 whole | Room temperature for blending |
| Pure Vanilla Extract 🌿 | 1 tbsp | High-quality, not imitation |
| Baking Soda 🧂 | ½ tsp | Ensures proper rise |
| Ground Cinnamon 🌶️ | 1 ½ tsp | Freshly ground preferred |
| Salt 🧂 | ½ tsp | Diamond Crystal preferred |
| Walnuts 🥜 | 1 cup | Chopped, toasted for flavor |
| Vegetable Oil 🫒 | ¼ cup | For moisture and tenderness |
The bananas are the heart of this recipe—ripe is key for that sweet, creamy texture. Look for bananas with brown spots but no bruising. Trader Joe's and Whole Foods often carry the perfect ones, or check your local grocery store's produce section. The walnuts should be raw, not pre-toasted, so you can control the level of toastiness. Toast them yourself in a dry pan for 3-4 minutes until fragrant—that aroma alone makes the kitchen smell like a bakery. For the butter, Land O'Lakes or Plugrá brands melt beautifully without any weird aftertaste, but any good-quality unsalted butter will work.
No vanilla extract? Vanilla bean paste works just as well, or even a scraped vanilla bean if you're feeling fancy. Running short on walnuts? Pecans or hazelnuts are great substitutes, though they'll change the flavor slightly. The baking soda is non-negotiable—it's what gives this bread that perfect lift. If you're worried about overmixing, use a rubber spatula and fold just until combined. For the sugar, I always use a mix of white and brown—the brown adds moisture and depth, while the white keeps it from being too dense. And if you're using a digital scale, 2 cups mashed bananas weigh about 12 oz, which helps with precision.
This loaf keeps beautifully—3-4 days at room temperature wrapped in foil, or up to 1 week in the fridge. For longer storage, slice and freeze individual portions for up to 3 months. I like to wrap the whole loaf in plastic wrap, then place it in a resealable bag to keep it fresh. The walnuts stay crispy for days if you toast them just before folding into the batter, but if you're prepping ahead, toast them the night before and store in an airtight container. Reheat slices in the toaster for that perfect crunch—kids love it warm!
Why You'll Love This Recipe
- No-Mess Mixing: I swear by the "dump-and-stir" method here—just mash those ripe bananas right in the bowl, then fold in the dry ingredients. No food processor, no extra bowls, and zero cleanup. That creamy banana butter swirl? It happens while you’re still measuring flour.
- Sweet Spot Balance: The combo of brown sugar’s caramel depth and granulated sugar’s crispness keeps every bite interesting—not too syrupy, not too dry. Honestly, the moment I taste that first slice still warm from the oven, I forget it’s basically dessert for breakfast.
- Lunchbox Legend: Between us, this is my go-to for after-school snacks or office treats. Slice it thin, wrap in foil, and it stays fresh for days—no weird textures or soggy edges. My kid’s teacher once asked for the recipe after three servings in a week.
- Pantry Rescue Hero: Ripe bananas turning brown? Butter sitting out too long? This recipe turns them into something amazing instead of waste. I’ve made it with slightly melted butter straight from the fridge, and the flavor’s still spot-on. Budget-friendly, too—uses staples you already own.
Step-by-step instructions for afterschool banana bread
This one-bowl method delivers perfectly moist banana bread with walnut streaks every time.
Prepare the Wet Ingredients
In a large mixing bowl, combine the 2 cups ripe bananas (mashed thoroughly with a fork) with the 0.5 cup unsalted butter and 0.25 cup vegetable oil. I like to use a rubber spatula for this step—it helps scrape up any banana remnants from the bowl. The mixture should be smooth with no visible banana chunks remaining.
Add the 1 cup granulated sugar and 0.5 cup packed brown sugar, mixing until fully incorporated. The sugars will begin to dissolve into the banana mixture, creating a thick, syrupy base. This is where the bread gets its signature moisture and subtle caramel notes. The brown sugar also adds that classic afterschool bread depth.
Next, add the 2 whole large eggs one at a time, whisking vigorously after each addition. Then stir in the 1 tbsp pure vanilla extract and 0.5 tsp baking soda. The baking soda will begin to activate immediately—you'll notice small bubbles forming as it reacts with the acidic bananas. This chemical reaction is what gives banana bread its characteristic lift.
Combine Dry Ingredients
In a separate medium bowl, whisk together the 1.5 cups all-purpose flour, 1.5 tsp ground cinnamon, and 0.5 tsp salt. Sifting the flour first prevents lumps and ensures even distribution of the spices throughout the batter. I find that using freshly ground cinnamon makes a noticeable difference in flavor—it's worth the extra step if you have a spice grinder.
Gradually add the dry mixture to the wet ingredients, mixing just until combined. Be careful not to overmix—you should still see some flour streaks in the batter. Overmixing develops gluten, which can make the bread dense rather than tender. The ideal consistency should be thick but pourable, like a rich cake batter.
Fold in the 1 cup chopped walnuts, reserving about 2 tablespoons for the topping. The walnuts should be evenly distributed throughout the batter. If you're using pre-toasted walnuts, their nutty aroma will permeate the bread as it bakes, adding another layer of complexity to the flavor profile.
Prepare the Pan and Bake
Preheat your oven to 350°F and grease a 9x5-inch loaf pan generously with butter or line it with parchment paper. The pan should be well-coated to prevent sticking—this is especially important for banana bread, which releases a lot of moisture as it bakes. Tap the pan gently on the counter to remove any air bubbles that might have formed in the batter.
Pour the batter into the prepared pan and sprinkle the reserved 2 tablespoons walnuts evenly over the top. This creates those beautiful walnut streaks that become crispy and golden during baking. Place the pan on the center rack of your oven and bake for 50-60 minutes, or until a toothpick inserted into the center comes out clean with just a few moist crumbs clinging to it.
The bread is done when the top is golden brown and the edges pull away slightly from the pan. If the top browns too quickly, tent the pan with aluminum foil to prevent over-browning while allowing the center to finish cooking. The internal temperature should reach 205-210°F at the center for perfect doneness.
Cool and Serve
Remove the banana bread from the oven and let it cool in the pan for 10 minutes. This resting period allows the bread to set slightly and makes it easier to remove without breaking. Then transfer it to a wire rack to cool completely for at least 30 minutes before slicing. Patience here is crucial—slicing too soon can result in a gummy texture.
Once fully cooled, slice the banana bread into ¼-inch thick pieces. Each slice should have a moist, tender crumb with those beautiful walnut streaks peeking through. The aroma of freshly baked banana bread with walnuts is unmistakable—warm, spiced, and just sweet enough. For best results, serve within 2-3 days or store in an airtight container at room temperature.
Pro Tips For Making Afterschool Banana Bread
- Mash Bananas Thoroughly: I learned this the hard way—lumpy banana bread tastes like you rushed. Use a fork to crush the bananas completely, then press through a fine-mesh sieve to remove skins and fiber. The smoother the batter, the lighter the crumb.
- Weigh Butter, Not Scoop: That "packed brown sugar" measurement means something. Use a kitchen scale for the butter—softened but not greasy—to avoid dryness. I used to eyeball it, and the texture always suffered. Two tablespoons? That’s not enough.
- Check Doneness with a Toothpick: The oven light isn’t your friend. Insert a toothpick into the center—if it comes out with a few moist crumbs but no wet batter, it’s done. Overbaking turns banana bread gummy, and underbaking leaves it dense. Timing varies, so trust the test.
- Swap Brown Sugar for Honey: Short on brown sugar? Swap half the packed amount with honey (adjust liquid elsewhere). It adds moisture and depth without altering the structure. My grandmother swore by this, and it works—especially if your bananas aren’t quite ripe enough.
Storing and reheating your afterschool banana bread
Room Temperature Storage
Store your banana bread at room temperature in an airtight container for up to 3-4 days. Wrap it tightly in plastic wrap first to lock in moisture, then place in the container.
I like to add a slice of bread or a paper towel inside to absorb any excess moisture that might make the bread soggy. The walnuts stay crispy this way, and the bread maintains its perfect texture for after-school snacking. 🍞
Fridge Preservation
For longer storage, refrigerate the banana bread in an airtight container for up to 1 week. The cold slows down staling, so the bread stays fresh and moist longer.
When you're ready to serve, let slices sit at room temperature for 5-10 minutes before eating—they’ll be warmer and more inviting. I often reheat slices in the toaster for a crispy exterior and soft interior, which kids love. 🥪
Freezing for Later
Slice the banana bread and freeze individual portions on a parchment-lined tray for 1 hour to prevent sticking. Once frozen solid, transfer slices to a resealable freezer bag or airtight container. This method preserves texture and prevents freezer burn.
Thaw overnight in the fridge or reheat directly from frozen in the toaster or microwave for 10-15 seconds per side. The walnuts stay crunchy, and the bread reheats beautifully. ❄️
Reheating Perfection
For the best texture, reheat banana bread slices in the toaster or oven. Set the toaster to medium heat and toast for 1-2 minutes until golden and crispy. For oven reheating, bake at 325°F for 5-7 minutes on a wire rack placed over a baking sheet.
This method ensures even heating without drying out the bread. Avoid the microwave—it can make the bread gummy. 🔥
Reviving Stale Bread
If your banana bread loses its freshness, don’t toss it! Wrap a slice in damp paper towels and microwave for 10-15 seconds. The steam will revive the moisture, making it taste almost fresh again.
For extra flavor, brush slices with melted butter or a thin layer of honey before reheating. This trick works wonders and reduces waste. 💫
Serving Suggestions
Serve banana bread with a dab of whipped cream, a scoop of vanilla ice cream, or a drizzle of warm caramel sauce. For a savory twist, pair it with peanut butter or almond butter on whole-grain toast.
The walnuts add a nice contrast to creamy toppings, making every bite feel special. Store leftovers in the fridge for up to 5 days or freeze for longer storage. 🍯
Nutrition facts
Frequently asked questions
Can I use unripe bananas for this recipe?
Unripe bananas won't work well—they're too firm and won't mash properly, resulting in a dense, dry loaf. Use bananas with brown spots but no bruising for that perfect sweet, creamy texture. If you're worried about overripe bananas, freeze them first and thaw before using.
What if I don't have walnuts? Can I substitute?
Try pecans, hazelnuts, or even chopped dates for a sweeter twist. If you prefer nut-free, omit them entirely—the recipe still works beautifully. Just reduce the topping by 2 tablespoons since you won't have streaks to sprinkle.
Why did my banana bread turn out gummy?
Overmixing or underbaking usually causes gummy texture. Mix just until combined (flour streaks should remain) and bake until a toothpick comes out with a few moist crumbs. Let it cool completely before slicing—cutting too soon traps steam, keeping it gummy. For extra moisture control, try baking at 325°F for 10 minutes longer.
Can I make this recipe without eggs?
Yes! Replace the 2 eggs with 2 tablespoons ground flaxseed + 6 tablespoons water (let sit for 5 minutes to thicken) or ½ cup unsweetened applesauce. The texture will be slightly denser but still delicious. For best results, reduce the baking time by 5-10 minutes since egg substitutes add moisture.
How do I know when the banana bread is fully baked?
Insert a toothpick into the center—it should come out clean or with just a few moist crumbs. The edges should pull away slightly from the pan, and the top should be golden brown. If unsure, check the internal temperature: 205-210°F is perfect. Overbaking dries it out, so err on the slightly underdone side if needed.