
Side Dishes
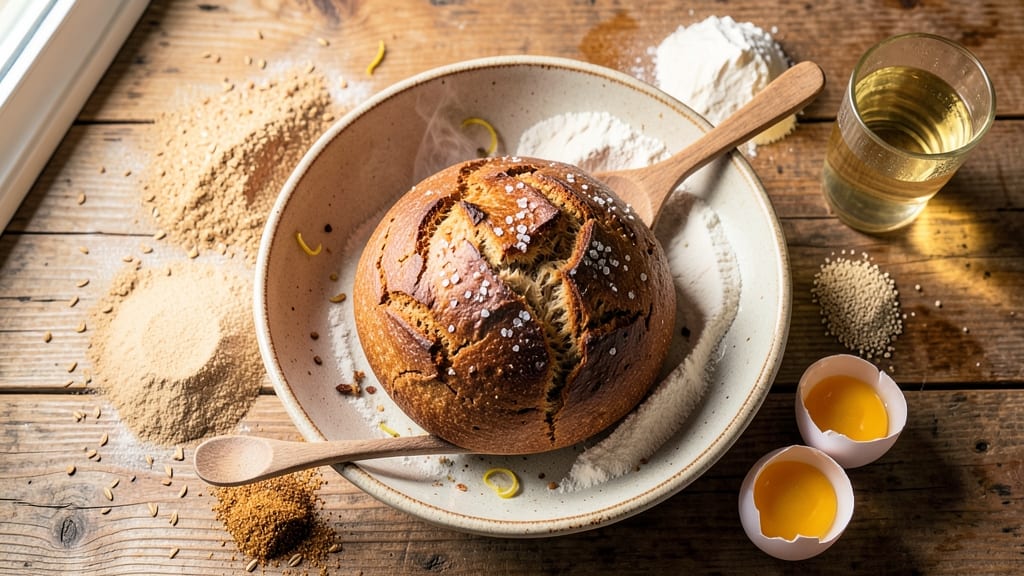
This active dry yeast whole wheat bread recipe transforms dense, heavy loaves into something light, airy, and packed with nutty flavor—no compromise on texture or taste.
The secret lies in proper yeast activation and a slow fermentation that develops gluten without overworking the dough, ensuring a tender crumb and crisp golden crust. I’ve baked this recipe dozens of times, perfecting it for home bakers who want restaurant-quality whole wheat bread without the heaviness.
What sets this recipe apart is the balance of hydration and kneading—just enough to build structure without toughness. We’ll use a mixer for efficiency while still hand-shaping the loaf for that artisanal touch.
The dough rests twice: first to activate the yeast fully, and again to relax the gluten, resulting in a loaf that’s easy to slice and perfect for sandwiches or toast. No more dry, crumbly whole wheat bread—just a loaf that rivals white bread in texture.
The nutty crust comes from a light egg wash and high oven temperature, while the light crumb is achieved through precise timing and temperature control during baking.
By the time you pull this loaf from the oven, you’ll have a fragrant, golden-brown loaf with an open crumb structure—ideal for slicing thick or toasting to crisp perfection. This recipe delivers on the promise of whole wheat bread that’s actually enjoyable to eat.
Whether you’re making sandwiches for lunch or serving toast with butter and jam, this bread will become your go-to. The process is straightforward but requires patience—worth every minute for a loaf that tastes homemade yet foolproof. Let’s get started on creating your best whole wheat bread yet.
Ingredients for active dry yeast whole wheat bread
Pantry staples plus a few specialty touches for that perfect whole wheat loaf.
| Ingredient | Amount | Notes |
|---|---|---|
| Active Dry Yeast 🍞 | 2 ¼ tsp | Ensure it's fresh and hasn't expired |
| Whole Wheat Flour 🌾 | 4 cups | High-protein variety preferred |
| All-Purpose Flour 🌾 | 1 cup | Balances texture and structure |
| Granulated Sugar 🍚 | 1 tbsp | Feeds yeast for activation |
| Salt 🧂 | 1 ½ tsp | Diamond Crystal preferred |
| Large Eggs 🥚 | 1 whole | Room temperature for best results |
| Unsalted Butter 🧈 | ½ cup | Cold, cubed for mixing |
| Warm Water 💧 | 1 ¼ cups | 110°F for yeast activation |
| Honey 🍯 | 1 tbsp | Enhances crust color and flavor |
| Cornmeal 🌽 | ¼ cup | For dusting bread pan |
| Milk 🥛 | 1 tbsp | For egg wash enrichment |
| Poppy Seeds 🌻 | 1 tsp | Optional for topping |
The yeast is your secret weapon here. King Arthur or Bob's Red Mill are my go-tos for active dry yeast—look for expiration dates on the package. Whole wheat flour varies wildly, so if you're new to baking with it, grab a bag of King Arthur's whole wheat blend; it's formulated for baking. The all-purpose flour is key for structure—don't skip it. For the butter, Land O'Lakes or Plugrá work perfectly, but any unsalted brand will do. Warm water should feel like bathwater—not too hot to touch. If you're unsure, use a thermometer to hit 110°F—yeast activates best in this range.
No whole wheat flour? Substitute half with spelt flour for a lighter texture. Short on butter? Olive oil at half the amount keeps things moist. The honey can be swapped for maple syrup if you prefer. For the egg wash, if you're avoiding eggs, milk plus 1 tsp vinegar makes a great vegan substitute. The poppy seeds are optional but add a nice crunch—sesame seeds work too. Cornmeal isn't strictly necessary, but it prevents sticking like a dream. If you're using a glass loaf pan, skip it entirely.
This dough needs time—at least 2 hours total for proper fermentation. Store any unused flour in an airtight container in a cool, dark place for up to 6 months. The yeast? Keep it in the fridge for up to 3 months if you want to extend its shelf life. Once baked, your loaf will keep wrapped at room temperature for 3 days or frozen for 3 months. I always make an extra loaf—freezing slices for toast later in the week is a game-changer.
Why You'll Love This Recipe
- No-Knead Magic: Honestly, the dough comes together in five minutes—just mix, let it rise, and bake. No standing at the counter, no arm workout, just set it and forget it while the yeast does all the heavy lifting.
- Nutty, Warm Depth: That whole wheat flour gives it a satisfying heartiness, but the touch of all-purpose keeps it light. The yeast blooms into a rich, airy crumb that’s way better than store-bought—crusty outside, soft inside, with just enough sweetness from the sugar to balance the earthy wheat.
- Lunchbox Hero: Between us, this bread is my go-to for sandwiches, toast, or even as a side for soups. It freezes beautifully too—toss a loaf in the freezer, and you’ve got fresh bread ready in a pinch. (Yes, even on a Tuesday night.)
- Pantry Staple: I make two loaves at a time—one for the week, one to stash. The yeast and flour cost pennies, and it keeps for days without turning stale. Budget-friendly? Absolutely. Reliable? You bet. My secret weapon for feeding the family without breaking the bank.
Step-by-step instructions for homemade whole wheat bread
Here's how to make a tender whole wheat loaf with a crisp crust and airy crumb—no dense texture in sight.
Activate the Yeast for Perfect Rise
In a small bowl, combine the 2.25 teaspoons active dry yeast, 1 tablespoon granulated sugar, and ½ cup of the 1.25 cups warm water (about 110°F). Let it sit for 5-10 minutes until frothy. You'll see tiny bubbles forming—this confirms your yeast is alive and ready to work. If it doesn't bubble, your yeast might be old, and you'll need to start fresh.
While waiting, whisk together the 4 cups whole wheat flour and 1.5 teaspoons salt in a large bowl. I like to use a whisk here to break up any flour clumps before mixing. The salt helps develop gluten, which gives your bread structure without making it tough. Keep this mixture aside—it's ready for the next step once the yeast is active.
Mix the Dough Until Smooth
Add the yeast mixture to the flour mixture, then stir in the 1 cup all-purpose flour and ½ cup cold, cubed unsalted butter. The butter should still be firm—this prevents the dough from becoming too soft. Mix with a wooden spoon until the dough starts coming together, then turn it out onto a lightly floured surface.
Knead the dough for 8-10 minutes by hand, pressing and folding it until smooth and elastic. You'll know it's ready when it springs back slowly when poked. If the dough feels too sticky, add 1 tablespoon of the reserved warm water at a time. The goal is a dough that's tacky but not wet—this ensures a light crumb without dryness.
Let the Dough Rise for Maximum Flavor
Lightly grease a large bowl, place the dough inside, and cover it with a damp towel. Let it rise in a warm spot for 1-1.5 hours, or until it's doubled in size. I like to place my oven on its lowest setting (170°F) with a bowl of hot water inside to create a warm, humid environment—this speeds up the rise without overproofing.
Gently press two fingers into the dough—if it springs back slowly, it's ready. If it springs back quickly, give it another 20-30 minutes. Overproofing leads to dense bread, so don't rush this step. Patience here makes all the difference for that light, airy texture you're after.
Shape and Second Rise for Height
Punch down the dough to release air, then divide it into 4 equal pieces (about 12 ounces each). Roll each piece into a ball, place them in a greased 9x5-inch loaf pan, and cover again with the damp towel. Let them rise for another 30-45 minutes until puffy. The dough should fill about ¾ of the pan—this ensures room to expand while baking.
Preheat your oven to 375°F while the dough rises. This temperature gives you a golden crust without burning the top. Brush the risen loaves with a mixture of 1 beaten egg and 1 tablespoon milk for a shiny finish. Sprinkle with 1 teaspoon poppy seeds if using—this adds a nice crunch and visual appeal.
Bake to Golden Perfection
Bake the loaves for 30-35 minutes until they're golden brown and sound hollow when tapped on the bottom. The internal temperature should reach 190-200°F. If the top browns too quickly, tent the loaves with aluminum foil to prevent over-browning while they finish baking.
Remove the bread from the oven and let it cool in the pan for 10 minutes, then transfer to a wire rack. This resting period allows the steam to escape, preventing a gummy texture. Slice when fully cooled—you'll be rewarded with a tender crumb and that beautiful nutty crust you've been dreaming of.
Pro Tips For Making Active Dry Yeast Whole Wheat Bread
- Bloom the Yeast First: DESCRIPTION: Skip mixing dry yeast straight into the flour—it’s slow and unreliable. Instead, dissolve it in warm (not hot) water with sugar first, then let it sit for 5-10 minutes until bubbly. Whole wheat flour absorbs moisture differently, so this step guarantees your yeast wakes up fully before meeting the dry ingredients.
- Mix Flours Separately: DESCRIPTION: Whole wheat flour is heavy and dense. Weigh out your all-purpose flour first, then add the whole wheat last—it’ll make your dough feel lighter to handle. I used to combine them early, and the dough always turned into a sticky mess.
- Don’t Over-Knead: DESCRIPTION: Whole wheat dough tears easily, and overworking it turns your bread into tough, dense bricks. Knead just until the dough springs back when poked (about 8-10 minutes by hand). Let the gluten do its thing during the first rise instead.
- Use a Banneton or Bowl: DESCRIPTION: No fancy proofing basket? A lightly oiled bowl works just fine—flip the dough seam-side up for a cleaner rise. I’ve ruined too many loaves by skipping this step, and the crust ends up uneven or cracked open. (Yes, even if you’re impatient like me.)
Essential equipment for this dish
Stand Mixer Magic
My KitchenAid Artisan Series stand mixer with the dough hook attachment saves me 15-20 minutes of hand-kneading while ensuring consistent gluten development. Set the mixer to speed 2 for 5 minutes after adding all ingredients—this builds structure without overworking the dough.
If using a hand mixer, opt for the paddle attachment to avoid overmixing, which can make whole wheat bread gummy. 💫
Proofing Essentials
A proofing basket or clean kitchen towel works perfectly for the first rise, but I prefer using a large glass bowl lined with parchment paper for easy cleanup. For the second rise, a greased 9x5-inch loaf pan (like Wilton's nonstick version) prevents sticking and ensures even baking.
Avoid metal pans—they conduct heat unevenly, risking burnt bottoms.
Yeast Thermometer
Investing in a digital instant-read thermometer (I use Thermoworks Thermapen) ensures your water is exactly 110°F—critical for yeast activation. Too hot (120°F+) kills yeast instantly; too cold (85°F-) slows fermentation.
A microwave-safe measuring cup also helps heat water precisely: microwave ½ cup water for 20 seconds, then check temp.
Baking Tools
A baking stone or steel pan (like Lodge's preheated cast iron) creates steam during baking, improving oven spring and crust texture. Place it on the middle rack 30 minutes before baking.
For testing doneness, a long wooden skewer works better than metal—it doesn’t conduct heat and gives a cleaner read on internal temperature.
Cooling Rack
Never cool bread directly on the pan—it traps steam, making slices gummy. My OXO Good Grips cooling rack (with wide spacing) circulates air evenly. For quick cooling, place the rack over a wire cooling tray to catch crumbs.If you’re short on time, a wire mesh rack over a baking sheet works in a pinch, but it’s less efficient.
Nutrition facts
Frequently asked questions
Why does this recipe use both whole wheat and all-purpose flour?
Whole wheat flour absorbs more moisture and can make bread dense if used alone. The 1 cup all-purpose flour balances texture by adding structure and elasticity. This blend gives you the nutty flavor of whole wheat without the heaviness. Think of it as the perfect compromise for a light, airy loaf.
Can I substitute instant yeast for active dry yeast?
Yes, but adjust the amount! Use 3/4 teaspoon instant yeast instead of 2.25 teaspoons active dry yeast and skip the sugar in the activation step. Instant yeast dissolves directly in the flour, saving time. Just make sure your oven is 170°F warm for proofing—it works faster than active dry yeast.
How do I know if my dough is overproofed?
Overproofed dough feels flat, spreads easily when poked, and has a slightly sour smell. If it springs back immediately when pressed with two fingers, it’s overproofed. The fix? Shape the dough quickly and bake right away—you’ll get a dense but still tasty loaf. For best results, aim for dough that springs back slowly (like a balloon deflating).
Why does my whole wheat bread turn out dry?
Dry bread usually means over-kneading or insufficient fat. Whole wheat dough needs extra butter/oil (try ½ cup total) and gentle kneading (8-10 minutes max). Also, avoid overbaking—pull the loaf when internal temp hits 190-200°F. For extra moisture, brush warm loaves with melted butter after cooling.
Can I make this recipe without a stand mixer?
Hand-kneading works perfectly—just work the dough on a floured surface for 8-10 minutes until smooth and elastic. For extra efficiency, use the windowpane test: stretch a small piece of dough thin enough to see light through it. If it tears easily, knead another 2 minutes. Patience here prevents tough bread.